
Rosemary/Thyme and Cheddar Sourdough Bread


Rosemary/Thyme and Cheddar Sourdough
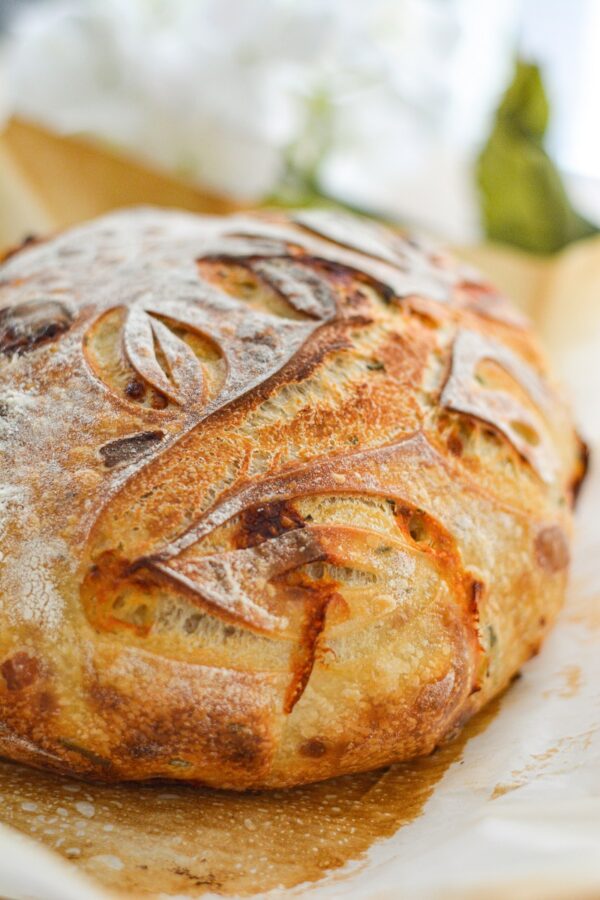
This Rosemary/Thyme and Cheddar Sourdough Bread, is perfect to have as an appetizer for lunch or as a sandwich bread for dinner. The soft texture given by the bread flour mixed with olive oil and the aromas that come out of it make any food better. I'm sure you will love it!
Equipment
- Digital Scale
- Bowl
- Scoring knife
- Banneton
- Dutch Oven
- Parchment Paper
Ingredients
- 1000 Grams Bread flour
- 750 Grams Water room temperature
- 200 Grams Sourdough starter doubled in size
- 20 Grams Fine salt
- 30 Grams Extra virgin olive oil
- 4 Tablespoons Mix of rosemary and thyme
- 8 Ounces Cheddar Cheese
Instructions
- 12 hours before you plan to mix the dough, feed your starter the following ratios 10:100:100 (starter,flour,water). You will need 200 grams for this recipe so make sure you make enough to use and to store.
- Measure all the ingredients separately and place them inside a bowl, except for the cheddar, rosemary/thyme which we will add later on.

- Using your hand or your stand mixer (dough hook) mix the ingredients until fully incorporated. Cover and let the dough rest for 30 minutes

- After the above time has passed - add the herbs and cheddar. Mix until fully incorporated.
- Perform folds every 30-45 minutes for the next 3 to 4 hours (depending on the doughs temperature)
- Your dough by the end of the bulk fermentation (after you've performed all the folds) should look and feel very smooth, elastic and extensible. As the photo.
- Sprinkle some flour on top, and using your hand or a scraper scoop the dough out of the bowl onto your kitchen counter
- Divide the dough into 1000 grams pieces and shape round or oval (depending on the shape of your banneton)
- Cover with plastic and let the dough rise until the rim of the banneton at room temperature
- After its risen, put the doughs inside the refrigerator for 12 to 24 hours for cold fermentation.
- After the above time has passed, preheat your Dutch Oven at 480F
- Once its preheated, bring the bread out of the refrigerator flip over parchmen and score.
- Place the loaf inside the Dutch Oven with the parchment paper and bake for 20 minutes with the lid on
- After the above time has passed, take the lid off and bake for an additional 10 to 15 minutes, depending on your desired taste.


Video
Notes
Baking Temperature: 480F
Time: 30-40 minutes (half of the time with the lid on)
Have you made this one?Remember to tag me on IG @vituperiobread so I can see it!

Previous


12 Comments
Dennie G
If I choose not to do the starter, can I just use yeast and how much?
Vituperio
Hi Dennie! You can’t convert this recipe for one using commercial yeast, as it will completely change the ratios and also the process will need to be different. I will make something similar with commercial yeast and post it in the next weeks.
Annie
This recipe is great! I followed it exactly and ended up with a fluffy and flavorful loaf of bread. I definitely recommend this recipe to other bakers.
Jim
This looks great. One question: Is the cheese amount (8 ounces) in weight or volume? I’m looking forward to trying this recipe soon. Thanks.
Vituperio
in weight!
hey
Willie G youllied
Greetings! Very useful advice in this particular article!
It’s the little changes that produce the greatest changes.
Thanks for sharing!
Vituperio
You are welcome! and definitely the little changes make a difference 🙂
Victoria Brodie
I did half the amount for one loaf and used aged double Gloucester and onion cheese and thyme it is superb
Done this 3 times now
Vituperio
Victoria I’m so glad to read that!! next time send me photos 🙂 would love to see!!
Patrick Stendahl
Hello!! I have attempted this recipe in total 3-4 times. I got success on my first 1st, it tasted and certainly smelled like HEAVEN <3. This prompted my 2nd attempt… a failure. and Now pictures of the 4th. I followed the recipe for two loaves however, the only change I made to prompt more leavening action, and eliminate any fears that my dough over-proofed the evening before, was to add 1g of the commercial premium red star platinum baking yeast (which definitely did the job). Here are pictures of the 4th bake and the two different scoring patterns I experimented with. I am not very good at that part yet. Enjoy! Thank you for the recipe Javi.
https://ibb.co/FV7xj2T
https://ibb.co/m0tV28S
https://ibb.co/cxGj14F
https://ibb.co/4tzmvTB
https://ibb.co/TWvpRf9
https://ibb.co/2gpLX8C
Vituperio
oh Patrick it looks amazing!! I’m so happy you have given it a couple of tries. If you ever have any additional questions just let me know 😉
Laura Borgess
Currently doing my stretch and folds but wanted to point out that there, I believe, is an error in your directions where you reference the ratios for feeding your starter. I believe it should be 100/100/100 and not 10/100/100. Please disregard if I am in error.