Each time you make it, you’re rewarded with a loaf that’s beautifully golden, crusty on the outside, and soft and chewy inside. It makes the house smell incredible and feels like such an accomplishment. It is such a friendly sourdough bread recipe!
The process is therapeutic, and the result is something you’re proud to share (or savor all by yourself). Whether it’s your first loaf or your fiftieth, this recipe just feels like home.
Why I love this beginner's sourdough recipe
Easy to shape
The amount of water this easy sourdough bread dough has, will allow you to easily shape. In my experience that is usually where some of the struggles happen. This dough will be easy to handle with little flour.
Simple ingredients
For this beginner’s sourdough bread recipe we will only use: all purpose flour, whole wheat flour, sourdough starter, water, salt.
Simple process
Making sourdough bread might seem difficult, but if you are able to visualize the process in blocks and understand what each stage is about, you will be able to do this recipe and others successfully!
Summary of the Process
Remember that ALL TIMINGS provided in this beginner’s sourdough bread recipe, have been calculated based on a dough temperature of 85F.
If you don’t have a dough proofer to keep the temperature of the dough consistent, then, you need to have in mind that you need to adjust timings.
More important than following time, is knowing the temperature of the dough (using a thermometer) to take real temperatures. That will give you a better idea on how things are evolving.
As an example – a dough at 70F, will take 40% extra time than what I have in this recipe.
Levain
Mix
Folds
Shape
Bake
Let's GetReady
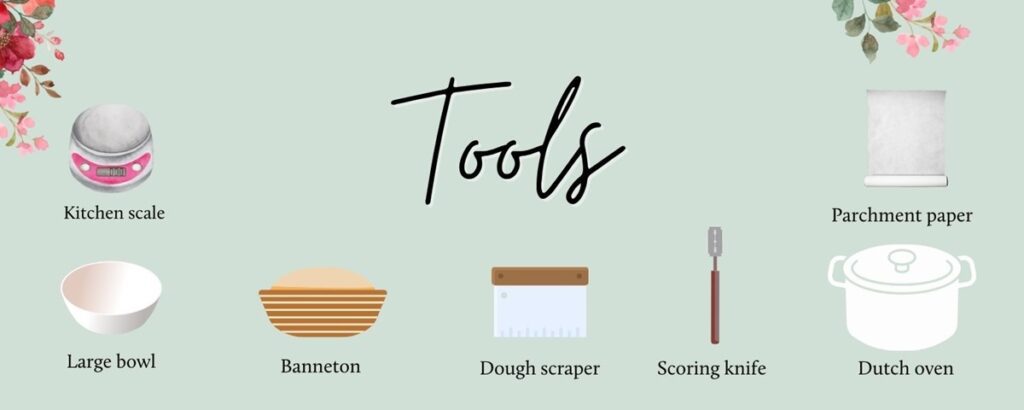
Tools needed
The tools we will be using are:
Kitchen digital scale
Large bowl
Banneton
Dough scraper
Scoring knife
Dutch oven (5qt at least)
Parchment paper
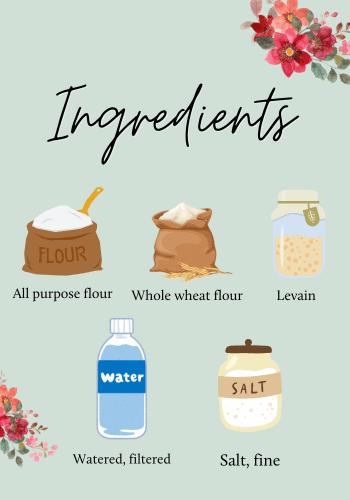
Ingredients needed
All purpose flour (never bleached or bromated)
Whole wheat flour (never bleached or bromated)
Water, filtered
Levain (ripe sourdough starter) – click here to know what a levain is
Replacing a sourdough starter for commercial yeast is not a straightforward substitution. The sourdough starter is made of flour, water and mother starter, which is different (in weight and form) from the powder texture of commercial yeast.
If you want to start using a sourdough starter you can shop my 8 year old here! There is FREE shipping and comes with video instructions, digital ebook and email support.
That controlling the temperature of the dough is key! Yeasts will only make your dough rise if the temperature is right for them. So make sure you have a warm spot, or use a dough proofer. I have provided all my favorite tools here.
If your dough is constantly at 85F, it should take you between 4 to 5 hours for the dough to fully rise. After shaping, you will need to place the dough in the refrigerator for 12 hours, max 24 hours.
You don’t need to use filtered water as long as the water where you live is not heavily chlorined. Try to use the same water that you use to feed your starter.
Don’t add a tray with ice or boiling water, as you risk breaking your oven glass door. If you don’t have a dutch use the method I provide here.
Baking Schedule
I’ve provided 2 possible baking schedules which you can find below.
Have in mind, that I have created these schedules under an 85°F environment (using a dough proofer – check my favorite ones here). I highly recommend taking the temperature of your bread dough throughout the process as it will give you important information on how things are evolving.
Below are 2 possible schedules to make this beginner’s sourdough bread recipe.
Baking Schedule - Option 1
Time
Step
Summary
8pm
Prepare Levain
12 hours on the day before planning to mix
8:00am - 8:20am
Weigh ingredients and mix dough
Mixing, bulk fermentation, shape
8:20am - 12:20pm
Perform folds every 30/45 minutes
12:20pm-12:30pm
Divide, pre-shape and bench rest
12:30pm-12:40pm
Final shape and place into banneton or loaf pan
12:40pm
Asses if it needs more rising. If it does, add 30 minutes and assess again
12:40pm
Place in the refrigerator to proof until next day
Next day
Bake
Baking
Baking Schedule - Option 2
Time
Step
Summary
7:30 am
Prepare levain (use fast rising levain recipe)
12 hours prior to mixing
12:30pm -12:50pm
Weigh ingredients and mix dough
Mixing, bulk fermentation, shape
12:50pm - 4:50pm
Perform folds every 45 minutes
4:50pm- 5:00pm
Divide, pre-shape and bench rest
5:00pm-5:10pm
Final shape and place into banneton or loaf pan
5:10 pm
Asses if it needs more rising. If it does, add 30 minutes and assess again
5:10 pm
Place in the refrigerator to proof until next day
Next day
Bake
Baking
1. Prepare the Levain
The below tables are 2 possible levain ratios to fit into the schedules provided above.
Have in mind that I have created these schedules considering the levain sits at 85°F (using a dough proofer – check my favorite ones here).
If you are not sure what a levain is, click here to check a post about it.
Depending on the baking schedule you selected, follow the corresponding Levain recipe.
Remember that after making the Levain, you will need to let is sit in a warm spot to rise and double in size before being used in this sourdough bread recipe.
Always have in mind...
That the amount of time that the Levain will take to rise, depends 100% on the temperature it sits at.
For that reason, I always use a dough proofer to have a consistent 85°F environment.
OPTION 1
Levain recipe - Slow rise (12 hours)
The below levain recipe is for 1 loaf and it will be ready (doubled in size) in 12 hours if left to rise at 85°.
Ingredient
Grams
Baker's Math
All purpose flour
50
100%
Water
50
100%
Mother sourdough starter
5
10%
Total
105
210%
OPTION 2
Levain recipe - Fast rise (4 hours)
The below levain recipe is for 1 loaf and it will be ready (doubled in size) in 4 hours if left to rise at 85°.
Ingredient
Grams
Baker's Math
All purpose flour
35
100%
Water
35
100%
Mother sourdough starter
35
100%
Total
105
300%
2. Weigh Ingredients & Mix
Here is the recipe you will be mixing! The recipe for this beginner’s sourdough considers making 1 loaf. I always recommend making more than 1, to make the process worth it. You can always freeze and store your loaves!
Ingredients for 1 loaf
Grams
Baker's Math
All Purpose Flour
400
80%
Whole Wheat Flour
100
20%
Water
350
70%
Levain
100
20%
Salt
10
2%
Total Dough
960
192%
3. Bulk Fermentation
After mixing the dough, you will enter the next part of the bread baking process called “Bulk Fermentation”. During this time, you will help the dough create a strong gluten network, while giving the sourdough starter enough time to produce CO2.
Folds, every 30-45 min
The strength of the gluten network, hence its ability to trap gasses, will be achieved by performing folds. Ideally you will perform a fold every time the dough relaxes, which should be every 30-45 minutes. If you can’t perform all of them, just perform as many as you can. Don’t perform folds if less than 30 minutes have passed, as it will serve no purpose if the dough has not fully relaxed.
Can you perform folds more often? For example... every 15 minutes?
Don’t perform folds if less than 20 minutes have passed, as it will serve no purpose if the dough has not fully relaxed. You will notice that the dough tightens with folds, and it will relax as it sits still in between folds.
Why do you need to perform folds?
Because folds, will strengthen the gluten network. This will allow the dough to easily trap the CO2 the the sourdough starter will produce.
Production of CO2 and by-products
During this part of the process we are trying to make the dough rise. For that to happen, we need time and temperature. Ideally, your dough should be 85°F, which can be obtained by using a dough proofer. If you don’t have one and the temperature of the dough is less than 85°F, it will take longer for the yeasts to produce enough CO2. The opposite will happen if the temperature of the dough is higher than 85°F. The dough will rise faster than expected, and you will need to shorten your bulk fermentation time.
How does temperature affect bulk fermentation?
If your dough is at 85°F (which could only be obtained by using a dough proofer) the dough will be ready in approximately 4 hours.
However, if the dough is warmer than that (it should never be above 90F) set a timer for 3 hours to assess how much CO2 has been built.
If the dough is colder, you dough will need more than 4 hours to fully rise. Your dough will be ready when it has built the CO2 it needs! If that is 4 hours or 6 hours… that is fine.
Check out how to perform folds on the video below
4. Divide and Shape
The recipe makes 1 loaf. If making more than 1 recipe, always use a dough scraper to divide (or anything that allows you to make a clean cut).
During this part of the process you don’t want to lose the CO2 that is trapped inside the dough. For that reason, be very gentle when manipulating it.
When shaping, you don’t need more than few grams of flour. Make sure to check out the video of this recipe so you can see how I shape. If you already added too much flour and the dough is sliding on the counter when shaping, brush it off and using a moist towel, make the dough sticky again.
Don't add too much flour when shaping...
When shaping, you don’t need more than few grams of flour. Make sure to check out the video of this recipe so you can see how I shape. If you already added too much flour and the dough is sliding on the counter when shaping, brush it off and using a moist towel, make the dough sticky again.
5. Proof (Cold)
Asses if it's risen enough...
Always asses if your beginner’s sourdough bread dough has built the necessary CO2 after you’ve shaped it. Why? as the dough might need extra time to rise. This, as manipulating the dough will allow CO2 to escape when you are learning to shape. If you dough is not filling up an 8.5” x 6” x 3” banneton to the rim, cover it with food plastic wrap, and let it sit until it gets there.
Cold proofing
Place your proofed dough covered with plastic wrap in the refrigerator for 12 to 24 hours before being baked. This is an important part of the process to make sure you get the health benefits of working with a sourdough starter.
What are the health benefits?
By respecting the process you will have a loaf of bread that has the below health benefits.
Has a low glycemic index
Gluten is easier to digest
Phytic acid has been broken down
For the above to happen you need to give the sourdough starter enough time. That is why putting your shaped loaf inside a banneton for 12-24 hours in the refrigerator will guarantee that you get these health benefits.
6. Bake
Preheat the oven at 470F
You need to preheat the oven with the dutch oven inside (including the lid). Once the oven is preheated, you can take one of your doughs from the refrigerator. Then, cut a piece of parchment. It should be larger than the size of the loaf, as you will need to lift it to place inside the Dutch Oven.
Flip the dough onto parchment, and score
Flip the dough onto the parchment paper. Then dust the dough with all purpose flour (or any flour you have). Using a scoring knife, score your loaf. Scoring is important as it will let the dough know where it needs to rise from.
Place the dough and parchment paper inside the preheated dutch oven
Using oven mittens, place the preheated dutch oven on a safe and stable place. Carefully transfer the parchment paper with your dough inside the preheated Dutch Oven, put the lid on and take back to the oven.
Bake with lid on for 20 minutes...
Bake for 20 minutes with the lid on. Then, take the lid off and finish baking. It can take from 10-20 minutes to look nice and gold.
7. Store your Beginner's Sourdough Bread
How to correctly store sourdough bread
Once your baked sourdough bread is at room temperature you will need to wrap it. A ziploc bag or food plastic wrap is ideal (though not very eco-friendly). The goal is that the loaf does not dehydrate. Feel free to leave it on your kitchen counter if you house has air conditioner, otherwise store in the refrigerator.
Beginner's Sourdough Bread
Vituperio
New to sourdough bread baking? this easy no-knead recipe will guarantee you succeed at your 1st loaf!
Check the 2 recipes provided for the levain. None is better that the other, it will just depend on your preferred schedule. Then, either 4 or 12 hours before making this recipe, create the levain according to the instructions provided.Let it rise, ideally in a warm spot of 85F.It will be ready to be used in your dough when it has doubled in size.
Weigh ingredients
Using a kitchen digital scale, weigh the ingredients of the recipe.*Make sure your digital scale is in the correct unit: grams.
Autolyse
In a large bowl add: water, levain, all purpose flour and whole wheat flour. You will NOT add the salt at this point.Mix thoroughly, until you feel no flour lumps and see no dry spots. Let the dough rest for 30 minutes covered with plastic wrap (or anything to prevent it from creating a skin and getting contaminated by external agents).Instead of hand mixing, you can use your stand mixer with the dough hook.
Add salt
Once the above 30 min have passed, sprinkle the salt on top. Thoroughly mix the salt. You want to make sure it is evenly distributed.TIP: Fill a bowl with water, and get your hands wet to mix the salt in the dough. This will help the dough from sticking to your hands. Be careful no to add excess water to your dough.
Bulk Fermentation
Bulk fermentation: fold the dough from edge to center carefully. Perform folds every 30 minutes for 3 to 4 hours. It will depend on the temperature of the dough when this stage finishes. This is the most important part of making sourdough bread, as here is when the dough needs to rise! Not allowing the dough to build enough CO2 inside will result in a flat and dense loaf.
Divide/Shape
You will only if you do more than 1x this recipe or make smaller size breads.
Shape the dough:a. If using a banneton –sprinkle rice flour on the liner to prevent the bread from sticking (if you don't have rice flour, just use all purpose). The shaped dough will be placed seam side-up.b. If using a Loaf Pan, grease the loaf pan with oil or butter. The shaped dough will be place seam side-down.
Asses before cold proofing
If your dough needs to build more CO2 this is the moment!Remember that you can always allow your dough to sit a little longer to rise more. When learning to shape, you might lose C02 when manipulating the dough so this part of the process is very important for beginners.
Cold proofing
Place the banneton or loaf, covered in plastic wrap, inside the refrigerator for at least 12 hours and maximum 24 hours.
After cold proofing has been done, the next step is baking the loaf so start by preheating the oven with your Dutch Oven inside at 480°F. Once the oven has reached its temperature, go to the next step.
Bake
Preheat the oven with your Dutch Oven Inside at 480°F.
Cut a piece of parchment paper, as you will flip the bread over it.
Get the dough from the refrigerator and flip over the piece of parchment paper.
Score: using your scoring knife, gently cut the top of the dough making sure not to puncture too deep.
Place the bread carefully with the parchment paper inside the Dutch Oven and put the lid on. Bake for 20 minutes. Then, lower the T° to 450°F, take the lid off and bake for another 15-20minutes, or until the crust looks nice and golden.
Let the bread cool and enjoy!
Notes
The following recipe is the one I do with my students in my in-person workshops. Its easy, and it will make you get your basic sourdough bread skills to then branch out!
Have you made this one?Remember to tag me on IG @vituperiobread so I can see it!
You will love this beginner’s sourdough bread recipe because it’s simple, reliable, and deeply satisfying. With just a few humble ingredients—flour, water, salt, and starter—you create something truly magical. There’s no stress, no fancy equipment, just a calm rhythm of mixing, folding, waiting, and baking.
Each time you make it, you’re rewarded with a loaf that’s beautifully golden, crusty on the outside, and soft and chewy inside. It makes the house smell incredible and feels like such an accomplishment. It is such a friendly sourdough bread recipe!
The process is therapeutic, and the result is something you’re proud to share (or savor all by yourself). Whether it’s your first loaf or your fiftieth, this recipe just feels like home.
Why I love this beginner's sourdough recipe
Easy to shape
The amount of water this easy sourdough bread dough has, will allow you to easily shape. In my experience that is usually where some of the struggles happen. This dough will be easy to handle with little flour.
Simple ingredients
For this beginner’s sourdough bread recipe we will only use: all purpose flour, whole wheat flour, sourdough starter, water, salt.
Simple process
Making sourdough bread might seem difficult, but if you are able to visualize the process in blocks and understand what each stage is about, you will be able to do this recipe and others successfully!
Summary of the Process
Remember that ALL TIMINGS provided in this beginner’s sourdough bread recipe, have been calculated based on a dough temperature of 85F.
If you don’t have a dough proofer to keep the temperature of the dough consistent, then, you need to have in mind that you need to adjust timings.
More important than following time, is knowing the temperature of the dough (using a thermometer) to take real temperatures. That will give you a better idea on how things are evolving.
As an example – a dough at 70F, will take 40% extra time than what I have in this recipe.
Levain
Mix
Folds
Shape
Bake
Let's GetReady
Tools needed
The tools we will be using are:
Kitchen digital scale
Large bowl
Banneton
Dough scraper
Scoring knife
Dutch oven (5qt at least)
Parchment paper
Ingredients needed
All purpose flour (never bleached or bromated)
Whole wheat flour (never bleached or bromated)
Water, filtered
Levain (ripe sourdough starter) – click here to know what a levain is
Replacing a sourdough starter for commercial yeast is not a straightforward substitution. The sourdough starter is made of flour, water and mother starter, which is different (in weight and form) from the powder texture of commercial yeast.
If you want to start using a sourdough starter you can shop my 8 year old here! There is FREE shipping and comes with video instructions, digital ebook and email support.
That controlling the temperature of the dough is key! Yeasts will only make your dough rise if the temperature is right for them. So make sure you have a warm spot, or use a dough proofer. I have provided all my favorite tools here.
If your dough is constantly at 85F, it should take you between 4 to 5 hours for the dough to fully rise. After shaping, you will need to place the dough in the refrigerator for 12 hours, max 24 hours.
You don’t need to use filtered water as long as the water where you live is not heavily chlorined. Try to use the same water that you use to feed your starter.
Don’t add a tray with ice or boiling water, as you risk breaking your oven glass door. If you don’t have a dutch use the method I provide here.
Baking Schedule
I’ve provided 2 possible baking schedules which you can find below.
Have in mind, that I have created these schedules under an 85°F environment (using a dough proofer – check my favorite ones here). I highly recommend taking the temperature of your bread dough throughout the process as it will give you important information on how things are evolving.
Below are 2 possible schedules to make this beginner’s sourdough bread recipe.
Baking Schedule - Option 1
Time
Step
Summary
8pm
Prepare Levain
12 hours on the day before planning to mix
8:00am - 8:20am
Weigh ingredients and mix dough
Mixing, bulk fermentation, shape
8:20am - 12:20pm
Perform folds every 30/45 minutes
12:20pm-12:30pm
Divide, pre-shape and bench rest
12:30pm-12:40pm
Final shape and place into banneton or loaf pan
12:40pm
Asses if it needs more rising. If it does, add 30 minutes and assess again
12:40pm
Place in the refrigerator to proof until next day
Next day
Bake
Baking
Baking Schedule - Option 2
Time
Step
Summary
7:30 am
Prepare levain (use fast rising levain recipe)
12 hours prior to mixing
12:30pm -12:50pm
Weigh ingredients and mix dough
Mixing, bulk fermentation, shape
12:50pm - 4:50pm
Perform folds every 45 minutes
4:50pm- 5:00pm
Divide, pre-shape and bench rest
5:00pm-5:10pm
Final shape and place into banneton or loaf pan
5:10 pm
Asses if it needs more rising. If it does, add 30 minutes and assess again
5:10 pm
Place in the refrigerator to proof until next day
Next day
Bake
Baking
1. Prepare the Levain
The below tables are 2 possible levain ratios to fit into the schedules provided above.
Have in mind that I have created these schedules considering the levain sits at 85°F (using a dough proofer – check my favorite ones here).
If you are not sure what a levain is, click here to check a post about it.
Depending on the baking schedule you selected, follow the corresponding Levain recipe.
Remember that after making the Levain, you will need to let is sit in a warm spot to rise and double in size before being used in this sourdough bread recipe.
Always have in mind...
That the amount of time that the Levain will take to rise, depends 100% on the temperature it sits at.
For that reason, I always use a dough proofer to have a consistent 85°F environment.
OPTION 1
Levain recipe - Slow rise (12 hours)
The below levain recipe is for 1 loaf and it will be ready (doubled in size) in 12 hours if left to rise at 85°.
Ingredient
Grams
Baker's Math
All purpose flour
50
100%
Water
50
100%
Mother sourdough starter
5
10%
Total
105
210%
OPTION 2
Levain recipe - Fast rise (4 hours)
The below levain recipe is for 1 loaf and it will be ready (doubled in size) in 4 hours if left to rise at 85°.
Ingredient
Grams
Baker's Math
All purpose flour
35
100%
Water
35
100%
Mother sourdough starter
35
100%
Total
105
300%
2. Weigh Ingredients & Mix
Here is the recipe you will be mixing! The recipe for this beginner’s sourdough considers making 1 loaf. I always recommend making more than 1, to make the process worth it. You can always freeze and store your loaves!
Ingredients for 1 loaf
Grams
Baker's Math
All Purpose Flour
400
80%
Whole Wheat Flour
100
20%
Water
350
70%
Levain
100
20%
Salt
10
2%
Total Dough
960
192%
3. Bulk Fermentation
After mixing the dough, you will enter the next part of the bread baking process called “Bulk Fermentation”. During this time, you will help the dough create a strong gluten network, while giving the sourdough starter enough time to produce CO2.
Folds, every 30-45 min
The strength of the gluten network, hence its ability to trap gasses, will be achieved by performing folds. Ideally you will perform a fold every time the dough relaxes, which should be every 30-45 minutes. If you can’t perform all of them, just perform as many as you can. Don’t perform folds if less than 30 minutes have passed, as it will serve no purpose if the dough has not fully relaxed.
Can you perform folds more often? For example... every 15 minutes?
Don’t perform folds if less than 20 minutes have passed, as it will serve no purpose if the dough has not fully relaxed. You will notice that the dough tightens with folds, and it will relax as it sits still in between folds.
Why do you need to perform folds?
Because folds, will strengthen the gluten network. This will allow the dough to easily trap the CO2 the the sourdough starter will produce.
Production of CO2 and by-products
During this part of the process we are trying to make the dough rise. For that to happen, we need time and temperature. Ideally, your dough should be 85°F, which can be obtained by using a dough proofer. If you don’t have one and the temperature of the dough is less than 85°F, it will take longer for the yeasts to produce enough CO2. The opposite will happen if the temperature of the dough is higher than 85°F. The dough will rise faster than expected, and you will need to shorten your bulk fermentation time.
How does temperature affect bulk fermentation?
If your dough is at 85°F (which could only be obtained by using a dough proofer) the dough will be ready in approximately 4 hours.
However, if the dough is warmer than that (it should never be above 90F) set a timer for 3 hours to assess how much CO2 has been built.
If the dough is colder, you dough will need more than 4 hours to fully rise. Your dough will be ready when it has built the CO2 it needs! If that is 4 hours or 6 hours… that is fine.
Check out how to perform folds on the video below
4. Divide and Shape
The recipe makes 1 loaf. If making more than 1 recipe, always use a dough scraper to divide (or anything that allows you to make a clean cut).
During this part of the process you don’t want to lose the CO2 that is trapped inside the dough. For that reason, be very gentle when manipulating it.
When shaping, you don’t need more than few grams of flour. Make sure to check out the video of this recipe so you can see how I shape. If you already added too much flour and the dough is sliding on the counter when shaping, brush it off and using a moist towel, make the dough sticky again.
Don't add too much flour when shaping...
When shaping, you don’t need more than few grams of flour. Make sure to check out the video of this recipe so you can see how I shape. If you already added too much flour and the dough is sliding on the counter when shaping, brush it off and using a moist towel, make the dough sticky again.
5. Proof (Cold)
Asses if it's risen enough...
Always asses if your beginner’s sourdough bread dough has built the necessary CO2 after you’ve shaped it. Why? as the dough might need extra time to rise. This, as manipulating the dough will allow CO2 to escape when you are learning to shape. If you dough is not filling up an 8.5” x 6” x 3” banneton to the rim, cover it with food plastic wrap, and let it sit until it gets there.
Cold proofing
Place your proofed dough covered with plastic wrap in the refrigerator for 12 to 24 hours before being baked. This is an important part of the process to make sure you get the health benefits of working with a sourdough starter.
What are the health benefits?
By respecting the process you will have a loaf of bread that has the below health benefits.
Has a low glycemic index
Gluten is easier to digest
Phytic acid has been broken down
For the above to happen you need to give the sourdough starter enough time. That is why putting your shaped loaf inside a banneton for 12-24 hours in the refrigerator will guarantee that you get these health benefits.
6. Bake
Preheat the oven at 470F
You need to preheat the oven with the dutch oven inside (including the lid). Once the oven is preheated, you can take one of your doughs from the refrigerator. Then, cut a piece of parchment. It should be larger than the size of the loaf, as you will need to lift it to place inside the Dutch Oven.
Flip the dough onto parchment, and score
Flip the dough onto the parchment paper. Then dust the dough with all purpose flour (or any flour you have). Using a scoring knife, score your loaf. Scoring is important as it will let the dough know where it needs to rise from.
Place the dough and parchment paper inside the preheated dutch oven
Using oven mittens, place the preheated dutch oven on a safe and stable place. Carefully transfer the parchment paper with your dough inside the preheated Dutch Oven, put the lid on and take back to the oven.
Bake with lid on for 20 minutes...
Bake for 20 minutes with the lid on. Then, take the lid off and finish baking. It can take from 10-20 minutes to look nice and gold.
7. Store your Beginner's Sourdough Bread
How to correctly store sourdough bread
Once your baked sourdough bread is at room temperature you will need to wrap it. A ziploc bag or food plastic wrap is ideal (though not very eco-friendly). The goal is that the loaf does not dehydrate. Feel free to leave it on your kitchen counter if you house has air conditioner, otherwise store in the refrigerator.
Beginner's Sourdough Bread
Vituperio
New to sourdough bread baking? this easy no-knead recipe will guarantee you succeed at your 1st loaf!
Check the 2 recipes provided for the levain. None is better that the other, it will just depend on your preferred schedule. Then, either 4 or 12 hours before making this recipe, create the levain according to the instructions provided.Let it rise, ideally in a warm spot of 85F.It will be ready to be used in your dough when it has doubled in size.
Weigh ingredients
Using a kitchen digital scale, weigh the ingredients of the recipe.*Make sure your digital scale is in the correct unit: grams.
Autolyse
In a large bowl add: water, levain, all purpose flour and whole wheat flour. You will NOT add the salt at this point.Mix thoroughly, until you feel no flour lumps and see no dry spots. Let the dough rest for 30 minutes covered with plastic wrap (or anything to prevent it from creating a skin and getting contaminated by external agents).Instead of hand mixing, you can use your stand mixer with the dough hook.
Add salt
Once the above 30 min have passed, sprinkle the salt on top. Thoroughly mix the salt. You want to make sure it is evenly distributed.TIP: Fill a bowl with water, and get your hands wet to mix the salt in the dough. This will help the dough from sticking to your hands. Be careful no to add excess water to your dough.
Bulk Fermentation
Bulk fermentation: fold the dough from edge to center carefully. Perform folds every 30 minutes for 3 to 4 hours. It will depend on the temperature of the dough when this stage finishes. This is the most important part of making sourdough bread, as here is when the dough needs to rise! Not allowing the dough to build enough CO2 inside will result in a flat and dense loaf.
Divide/Shape
You will only if you do more than 1x this recipe or make smaller size breads.
Shape the dough:a. If using a banneton –sprinkle rice flour on the liner to prevent the bread from sticking (if you don't have rice flour, just use all purpose). The shaped dough will be placed seam side-up.b. If using a Loaf Pan, grease the loaf pan with oil or butter. The shaped dough will be place seam side-down.
Asses before cold proofing
If your dough needs to build more CO2 this is the moment!Remember that you can always allow your dough to sit a little longer to rise more. When learning to shape, you might lose C02 when manipulating the dough so this part of the process is very important for beginners.
Cold proofing
Place the banneton or loaf, covered in plastic wrap, inside the refrigerator for at least 12 hours and maximum 24 hours.
After cold proofing has been done, the next step is baking the loaf so start by preheating the oven with your Dutch Oven inside at 480°F. Once the oven has reached its temperature, go to the next step.
Bake
Preheat the oven with your Dutch Oven Inside at 480°F.
Cut a piece of parchment paper, as you will flip the bread over it.
Get the dough from the refrigerator and flip over the piece of parchment paper.
Score: using your scoring knife, gently cut the top of the dough making sure not to puncture too deep.
Place the bread carefully with the parchment paper inside the Dutch Oven and put the lid on. Bake for 20 minutes. Then, lower the T° to 450°F, take the lid off and bake for another 15-20minutes, or until the crust looks nice and golden.
Let the bread cool and enjoy!
Notes
The following recipe is the one I do with my students in my in-person workshops. Its easy, and it will make you get your basic sourdough bread skills to then branch out!
Have you made this one?Remember to tag me on IG @vituperiobread so I can see it!
Join the Conversation
Maria E GioVincosays:
Thank you, thank you, thank you! I received the starter kit today and look forward to actively jumping into your method. I appreciate your patience with me.







Thank you, thank you, thank you! I received the starter kit today and look forward to actively jumping into your method. I appreciate your patience with me.
Fondly,
Your Sour Dough Starter problem child.